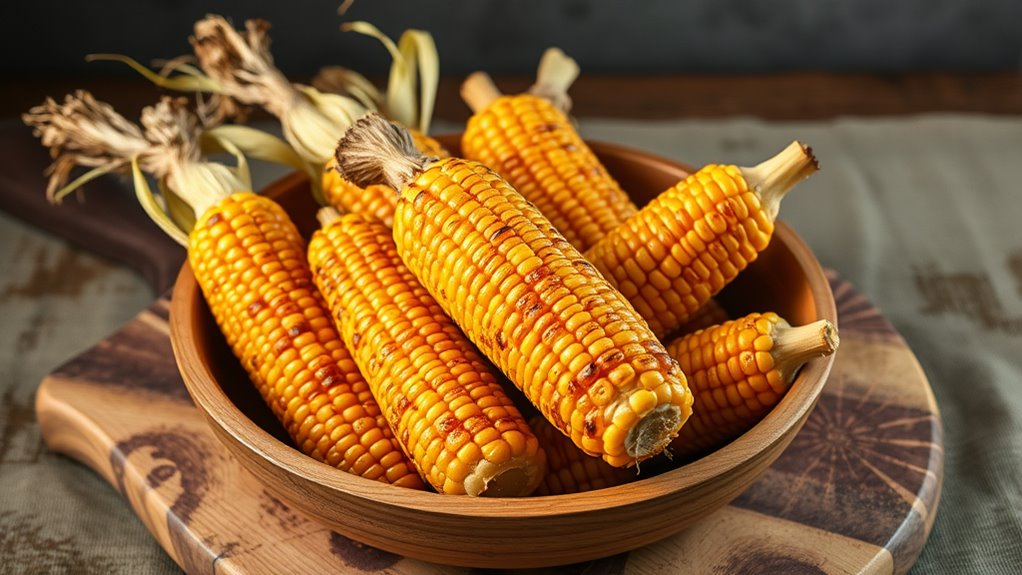
Puoi ottenere pannocchie perfettamente tostate con le bucce nel forno, ottenendo un'esperienza di sapore deliziosamente tenera, leggermente caramellata e personalizzabile. Semplicemente preriscaldare il forno a 425 °F, rimuovere le bucce e i fili setosi e condire con olio d'oliva per ricoprire uniformemente. Quindi, arrostire per 20-25 minuti, girando ogni 5-7 minuti, e regolando il tempo di cottura in base alle dimensioni e allo spessore del mais. Se cerchi maggiori dettagli su come esaltare la dolcezza naturale del mais, continua a leggere!
Storia
Come è successo? pannocchie di mais diventare un punto fermo a barbecue in giardino e ritrovi estivi? Potresti rimanere sorpreso nello scoprire che le origini del mais risalgono a oltre 7.000 anni fa antica MesoamericaFu addomesticato per la prima volta da un'erba selvatica chiamata teosinte, che cresceva in quelli che oggi sono il Messico e il Guatemala. Le antiche tecniche di coltivazione prevedevano la semina del mais in cumuli, spesso insieme a fagioli e zucca. Questo metodo delle "Tre Sorelle" permetteva alle colture di prosperare insieme. Con la diffusione del mais in tutte le Americhe, divenne una coltura fondamentale in molte culture. La sua popolarità arrivò infine ai barbecue in giardino e alle riunioni estive, dove ora è un contorno amato, perfetto da arrostire al forno con le brattee.
Ricetta
La pannocchia arrostita al forno è un contorno delizioso e facile da preparare Perfetto per ogni occasione. È un ottimo modo per gustare la pannocchia senza doverla grigliare o bollire. Il forno fa tutto il lavoro, il che si traduce in mais tenero e leggermente caramellato sarà sicuramente un successo tra familiari e amici.
Il bello della pannocchia al forno è che richiede il minimo sforzo e può essere personalizzata in base ai propri gusti. Si può condire con erbe aromatiche e spezie, oppure optare per una versione più semplice, con solo sale e pepe. In qualunque modo si scelga di prepararla, la pannocchia al forno conquisterà sicuramente tutti.
- 4-6 pannocchie di mais, sgusciate e setose
- 2 cucchiai di olio d'oliva
- 1 cucchiaino di sale
- 1 cucchiaino di pepe
- 1 cucchiaino di aglio in polvere (facoltativo)
- 1 cucchiaino di paprika (facoltativo)
Preriscaldare il forno a 220 °C (425 °F). Foderare una teglia da forno con un foglio di alluminio o carta da forno, lasciando abbastanza spazio per distribuire il mais in un unico strato. Disporre il mais sulla teglia preparata, condire con olio d'olivae cospargere con sale, pepe, aglio in polvere e paprika (se utilizzata). Mescolare per ricoprire uniformemente.
Arrostire il mais nel forno preriscaldato per 20-25 minuti, girando ogni 5-7 minuti, finché il mais non sarà tenero e leggermente caramellato. Potrebbe essere necessario regolare il tempo di cottura a seconda della dimensione e dello spessore delle pannocchie.
Quando cucinate le pannocchie al forno, assicuratevi di controllarle spesso per evitare di cuocerle troppo. Potete anche personalizzare la ricetta aggiungendo altri condimenti o erbe aromatiche come timo essiccato, peperoncino in polvere o parmigiano grattugiato. Sperimentate diverse combinazioni di sapori per trovare la vostra preferita!
L'elenco completo degli ingredienti

Hai il tuo forno preriscaldato e il tuo mais pronto per essere utilizzato – adesso è il momento di dare un'occhiata più da vicino gli ingredienti che renderanno questo piatto ancora più speciale.
- 4-6 pannocchie di mais con le foglie (scegliere opzioni biologiche per un sapore più naturale)
- 2 cucchiai di olio d'oliva (nota: questo è un allergene comune, quindi tieni conto delle esigenze dei tuoi ospiti)
- 1 cucchiaino di sale (per un gusto più delicato puoi usare il sale rosa dell'Himalaya)
- 1 cucchiaino di aglio in polvere (aggiungerne di più o di meno a piacere)
- Prezzemolo fresco o erba cipollina per guarnire, facoltativo)
Fasi di cottura
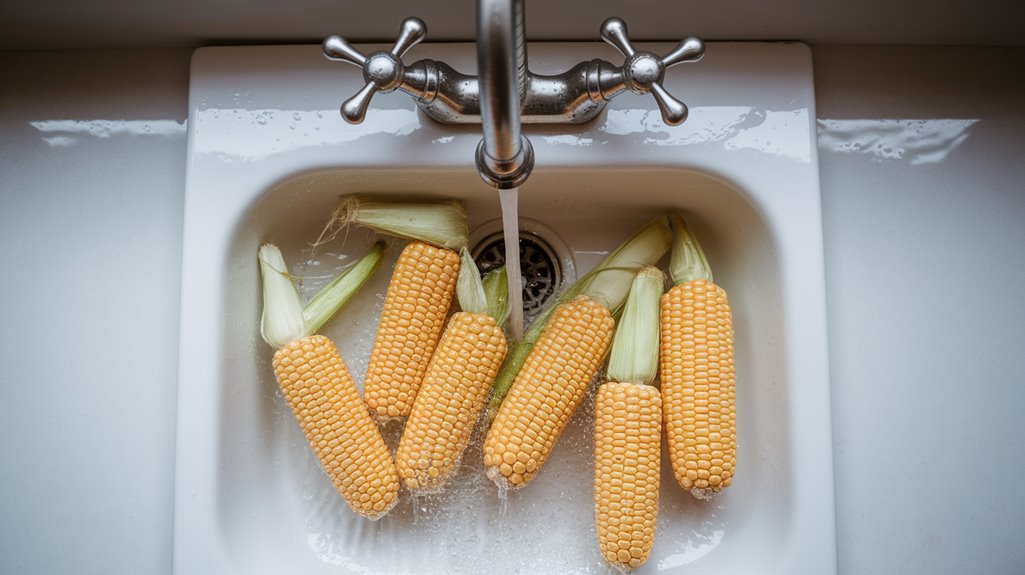
Ora sei pronto per iniziare a cucinare la tua pannocchia arrostita al forno. Primo, preriscaldate il forno a 425 gradi, quindi rimuovete le bucce da ogni pannocchia sotto l'acqua corrente del rubinetto. Prossimo, sciacquare il mais, asciugarlo con un canovaccio e condirlo con un filo d'olio d'oliva.
Passaggio 1. Preriscaldare il forno a 425

Inizia impostando il forno su 425 gradi Fahrenheit - Questo calore elevato aiuterà a far emergere la dolcezza naturale del mais. Sebbene la temperatura consigliata sia 425, temperature alternative Anche i risultati sono deliziosi. Ad esempio, puoi provare ad arrostire a 200 o 230 gradi Celsius, a seconda delle tue preferenze personali. Sfata i miti sul preriscaldamento che dicono che è necessario preriscaldare il forno per ore. Da dieci a quindici minuti è più che sufficiente per raggiungere la temperatura desiderata. Una volta che il forno è caldo, sei pronto per passare alla fase successiva: preparare il mais per la tostatura.
Rimuovere le bucce dalle orecchie

Togliete le bucce dalle pannocchie, tirandole verso il basso fino alla base. Otterrete un mucchio ordinato di bucce, perfette per i lavoretti con le bucce o da aggiungere al compost per ottenere benefici dal compost. Rimuovere i fili setosi Anche questo, ma non preoccuparti se rimangono alcuni fili sparsi. Tosterai il mais ad alta temperatura, il che aiuterà a carbonizzarlo e a rimuovere eventuali fili rimasti. Ora il tuo mais è pronto per essere infornato.
Fase 3. Sciacquare il mais sotto il rubinetto

Sciacquare il mais sotto un delicato getto del rubinetto, rimuovendo ogni residuo di sporco o detriti. Vuoi utilizzare una bassa pressione dell'acqua per evitare di staccare i chicchi di mais. Mentre risciacqui, ruotare delicatamente le orecchie per assicurarsi che tutte le superfici siano pulite. Questo passaggio è fondamentale per rimuovere sporco, batteri o altri contaminanti che potrebbero annidarsi sul mais. I metodi di pulizia dovrebbero privilegiare la delicatezza. preservare la dolcezza naturale del maisSciacquando il mais sotto un delicato getto d'acqua, potrai rimuovere sporco e detriti senza danneggiarlo, ottenendo così una deliziosa pannocchia arrostita al forno.
Passaggio 4. Asciugare tamponando con un asciugamano

Tamponare delicatamente l'umidità in eccesso dalle pannocchie con un asciugamano, assicurandosi di asciugarli piuttosto che strofinare energicamente. Questo aiuta impedire l'accumulo di vapore nel forno, assicurandoti che il tuo mais si arrostisca in modo uniformeQuando tamponate, assicuratevi di non usare l'asciugamano per strofinare o grattare il mais. Questo eviterà che eventuali residui di sporco o detriti penetrino più a fondo nelle bucce. Asciugando il maisOtterrai risultati di essiccazione migliori, con un processo di tostatura più efficiente. Ora che il mais è asciutto, sei pronto per passare alla fase successiva.
Passaggio 5. Condire con olio d'oliva

Versate un cucchiaio di olio d'oliva su ogni pannocchia, assicurandovi che sia ben ricoperta ma non gocciolante. Questo aiuta a far risaltare la dolcezza naturale e aggiunge un tocco di sapore. Sapevate che l'olio d'oliva ha benefici che vanno oltre la cottura?
| Benefici | Descrizione | Usi su capelli/pelle |
|---|---|---|
| Antiossidanti | Combatte i radicali liberi | Idrata e capelli |
| Idratante | Trattiene l'umidità | Ammorbidisce la pelle e i capelli |
| Antinfiammatorio | Riduce il rossore | Lenisce le irritazioni del cuoio capelluto |
Ora che il tuo mais è oliato, sei pronto per passare alla fase successiva!
Considerazioni finali
Mentre dai l'ultimo morso di pannocchie arrostite al forno, probabilmente starai pensando a quando potrai riaverlo – ed è esattamente ciò che questo ricetta semplice è pensato per ispirare. Ora che l'hai provato, ci piacerebbe molto ascolta i tuoi pensieri! Cosa ne pensi della ricetta? Hai feedback da parte dei lettori o idee di miglioramento da condividere? Magari hai un tocco originale da aggiungere o un suggerimento per una nuova combinazione di sapori. Qualunque cosa sia, siamo tutti orecchi e non vediamo l'ora di sentire cosa ne pensi. Il tuo contributo ci aiuterà. perfezionare la ricetta e renderlo ancora migliore per tutti!


